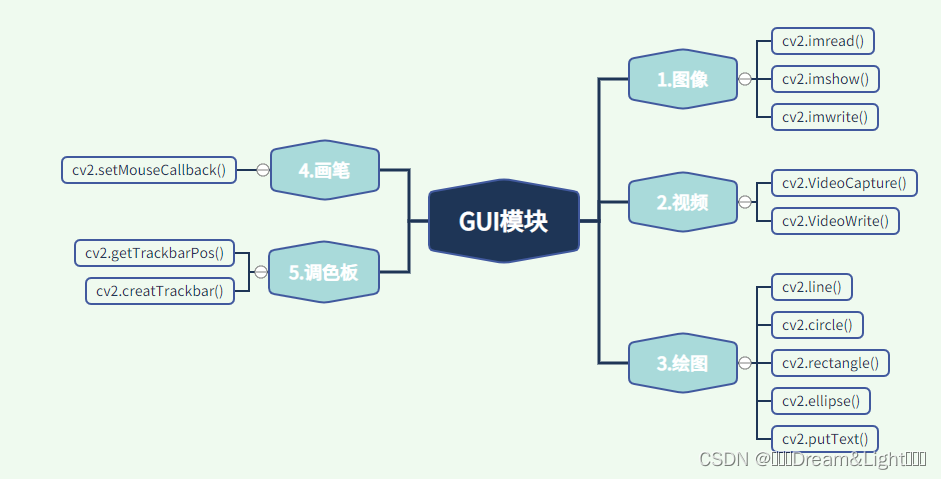
一、思维导图
二、相关操作
2.1、图像
二.一. 读取图像
cv2.imread(filename, flags)
文件名: 图片名或路径。 我不知道你在说什么, 但我不确定你在说什么。
flags:
cv2.IMRED_COLOR 1 值
Imred_ graySCALE, cv2. IMRED_ graySCALE, 0
cv2.IMRED_UNCHANED 1 值
2.1.1.2. 图像显示
cv2.imshow(filename, img)
文件名: 窗口的名称。 我不知道你在说什么, 但我不确定你在说什么。
img: 已显示的图像名称
二. 一. 一. 三. 三. 图像存储
cv2.imwrite(filename, img)
将图像另存为文件名, 类型: 字符串
要保存的图片( Img)
代码:
注意:
cv2.namedWindow(name, flags)
窗口名称
flags:
cv2. WINDOW_AUTOSIZE: 自动调整窗口大小 。
cv2. WINDOW_NORMAL: 窗口的大小可以更改 。
cv2.waitKey(flags)
flags:
没有键盘输入 (-1) 。
无限期等待键盘输入( 0)
您也可以使用 k=cv2. waitkey( 0) 来查看键盘按钮是否被按下 。
cv2. destroyallWindows( 名称) : 删除指定的窗口 。
2.2、视频
激活:可以用来将视频按框架分割,或者将框架合并制作视频。
cv2 . VideoCapture( flags )flags:获取摄像头:值为0浏览本地视频: 直接到视频文件cv2 . VideoWriter(outputname, fourcc, fps, (Width, Height),isColor)输出名: 已保存新视频编码 (四)fps:帧的大小H,W:帧的大小True/false: Is Color: Is Color: Is Color: Is Color: Is Color: Is Color: Is Color: Is Color: Is Color: Is Color:

2.3、绘图
图形图片( Img)
用于图形设计的颜色
选中度 : 如果闭合图形设置为 1, 则行的厚度将被填充。 默认值为 1 。
线型 : 线型, 8 连接, 反锯锯子等等。 默认值为 8 连接. cv2. LINE_ AA 正在反锯木, 所以看起来很平滑 。
线条必须开始(x1,y1)并结束(x2,y2) 。
cv2.line(img, (x1,y1), (x2,y2), color=(255,255,255), thickness=1)
矩形:需要左上角(x1,y1)和右下角(x2,y2)坐标。
cv2.rectangle(img,(x1,y1),(x2,y2),(0,255,0),thickness=3)
圆: 必须知道中心( x,y) 和半径(r) 的坐标 。
cv2.circle(img,(x,y), r, (0,0,255), thickness=-1)
椭圆: 需要中点坐标( x,y) 和长轴(a) 和短轴(b) 的长度。 旋转角度(c) 与时向相反, 顺时针角度(d) 和末角(d1)。
cv2.ellipse(img,(x,y),(a,b),c,d,d1,255,-1)
# 多边形:每个多边形顶点的坐标,用于构建二维阵列,其中行数等于顶点数,数据类型必须是英寸32。
pts=np.array([[x1,y1],[x2,y2],[x3,y3],[x4,y4]], np.int32)
pts=pts.reshape((-1,1,2))
cv2.polylines(img, pts=[points], isClosed=True, color=(255,255,255), thickness=1)# 文本 : 必须知道要绘制什么, 要绘制在哪里( x, y), 字体类型、 大小、 颜色和厚度 。
font=cv2.FONT_HERSHEY_SIMPLEX
cv2.putText(img,'OpenCV',(x,y), font, 4,(255,255,255),2)
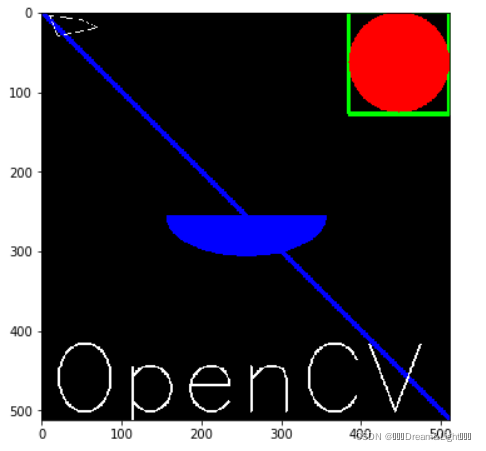
代码:
效果:
2.4、画笔
鼠标事件:
enum cv::MouseEventTypes {
cv::EVENT_MOUSEMOVE = 0,
cv::EVENT_LBUTTONDOWN = 1,
cv::EVENT_RBUTTONDOWN = 2,
cv::EVENT_MBUTTONDOWN = 3,
cv::EVENT_LBUTTONUP = 4,
cv::EVENT_RBUTTONUP = 5,
cv::EVENT_MBUTTONUP = 6,
cv::EVENT_LBUTTONDBLCLK = 7,
cv::EVENT_RBUTTONDBLCLK = 8,
cv::EVENT_MBUTTONDBLCLK = 9,
cv::EVENT_MOUSEWHEEL = 10,
cv::EVENT_MOUSEHWHEEL = 11
}
enum cv::MouseEventFlags {
cv::EVENT_FLAG_LBUTTON = 1,
cv::EVENT_FLAG_RBUTTON = 2,
cv::EVENT_FLAG_MBUTTON = 4,
cv::EVENT_FLAG_CTRLKEY = 8,
cv::EVENT_FLAG_SHIFTKEY = 16,
cv::EVENT_FLAG_ALTKEY = 32
}
代码:
2.5、调色板
cv2.getTrackbarPos(trackbarname, winname)Parameters:-trackbarname:Name of the trackbar- winname:Name of the window that is the parent of the trackbarReturn:- return the current position of the specified trackbarcv2.creatTrackbar(trackbarname,winname,value,count,onChange,userdata)Parameters:-trackbarname: name of created trackbar-winname: Name of the window that will be used as a parent of the created trackbar-value: Optional pointer to an integer variable whose value reflects the position of the creation,Upon creation,the slider position is defined by this variable.-count: Maximal position of the slider.the minimal position is always 0.-onChange: Pointer to the function to be called every time the slider changes position.This function should be prototyped as void Foo(int,void*);,where the first parameter is the trackbar position and the second parameter is the user data(see the next parameter).if the callback is the NULL pointer,no callbacks are called ,but only value is updated.userdata: User data that is passed as is to the callback.It can be used to handle trackbar events withoutusing global variables.
cv2.setMouseCallback(winname,onMouse,userdata=0)Parameters:-winname:Name of the window-onMouse : Mouse callback.See OpenCV samples,such as Link ,on how to specify and use the callback.-userdata: The optional parameter passed to the callbacktypedef void(* cv::MouseCallback) (int event, int x, int y, int flags, void *userdata)Parameters:
-event: one of the cv::MouseEventTypes constants.-x: the x-coordinate of the mouse event.-y: the y-coordinate of the mouse event.-flags: one of the cv::MouseEventFlags constants-userdata: The optional parameter.
code:
result: